
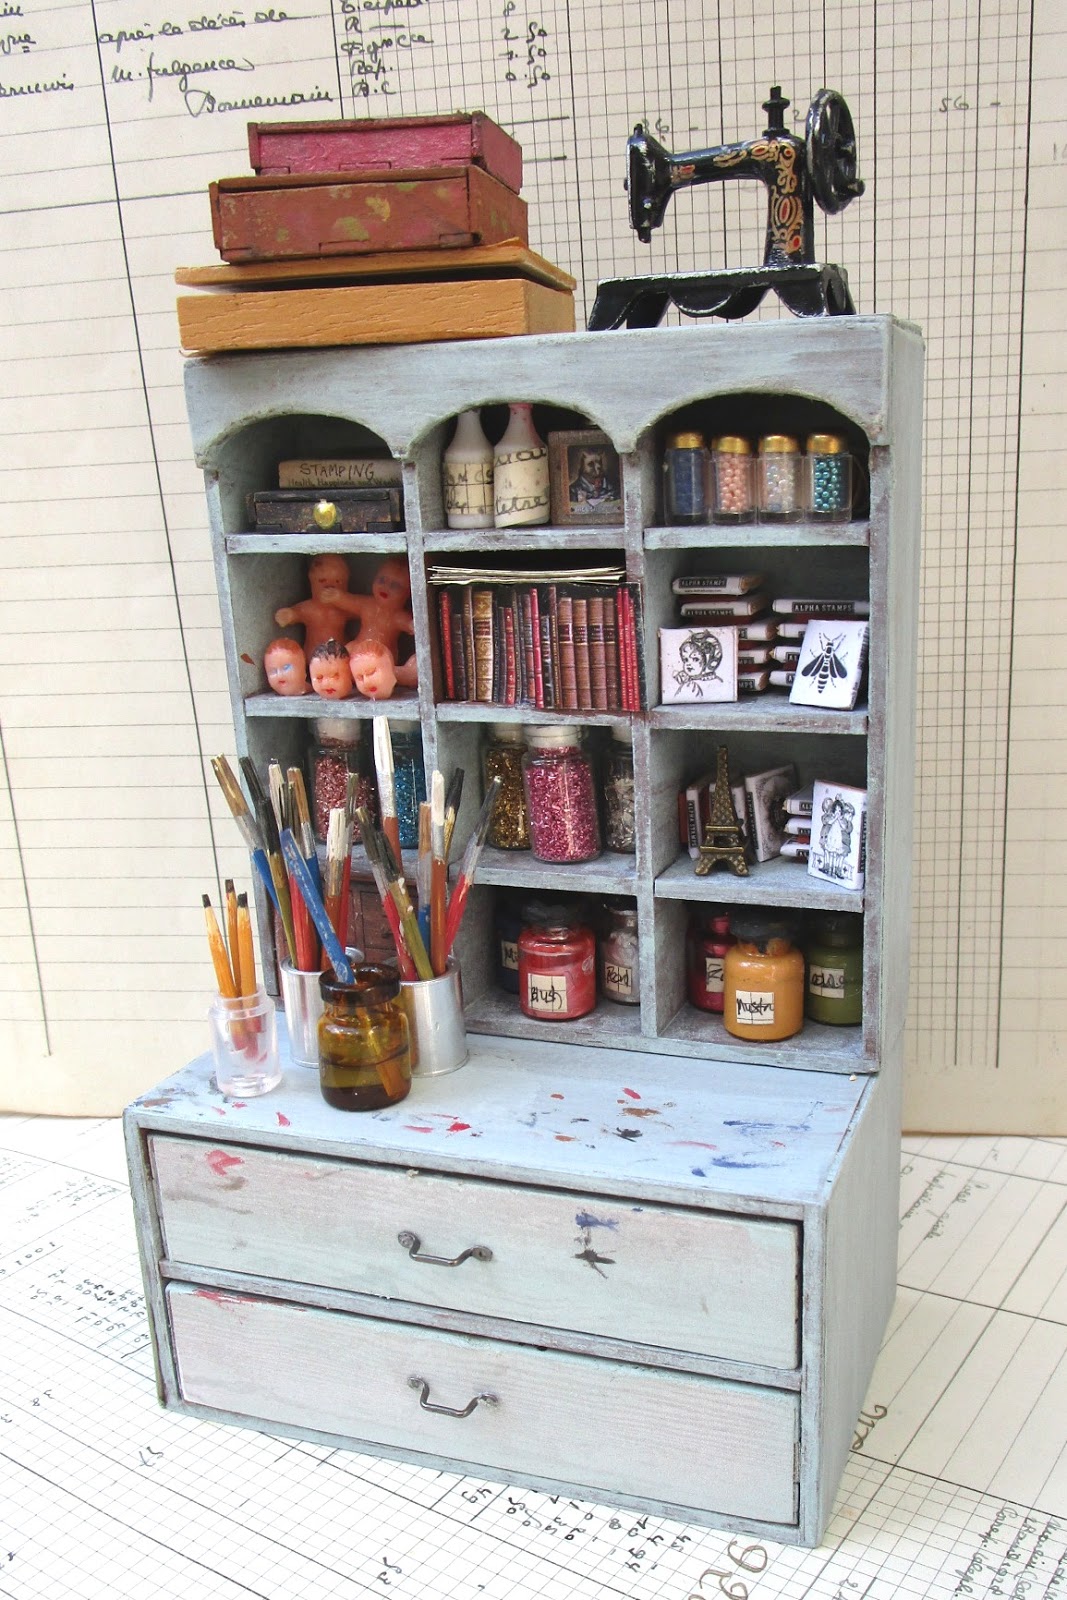
Welcome to my miniature art studio. For this post, I will focus on my beloved hutch that I found at a mini antique shop. It holds many of my treasures and favorite things to use when creating art. Let's have a look!

Not only do I have multiple shelves, I also have two large drawers and a large desk top to work on. It's my favorite spot to play.


One can never have too many ink pads or paint brushes.

I have had this old paint set for a while now. I love all of the shades of paint I have to use.

There is room on the top of my hutch to store things as well, like my old boxes of supplies and my vintage sewing machine, although I don't really sew much. I just love the way it looks.

On the left you will see one of my mother's vintage miniatures containing thread. On the right is a pencil box I created using the Mini Cigar Box Set.

I used silver tape to make hinges for some boxes, and Liquid
Pearls - Gold
Pearl* to make the others.


 \
\
True to life, my miniature desk top is covered in paint, just like my real desk top.


Do you like my mini paint tubes? You will not believe how simple they are to make. I was inspired by this tutorial on YouTube Miniature Paints that I found on Pinterest. That place is addicting! I found so many miniature ideas. Feel free to follow me RhondaMum and visit my boards Miniature and Art Studios Big & Small for more great ideas.

On the tutorial, she used some type of thin metal. I couldn't find mine so I used this adhesive silver tape I had instead. I trimmed a tad of the back paper off so I could use it to adhere my paint tube together.
To make each tube an individual color, I used washi tape in different colors and darker designs. Then put some white clay in the top and added color to make them look like paint was coming out.


Find a miniature scissor making tutorial here, Minyatür makas imalatı..... Luckily they included great photos.

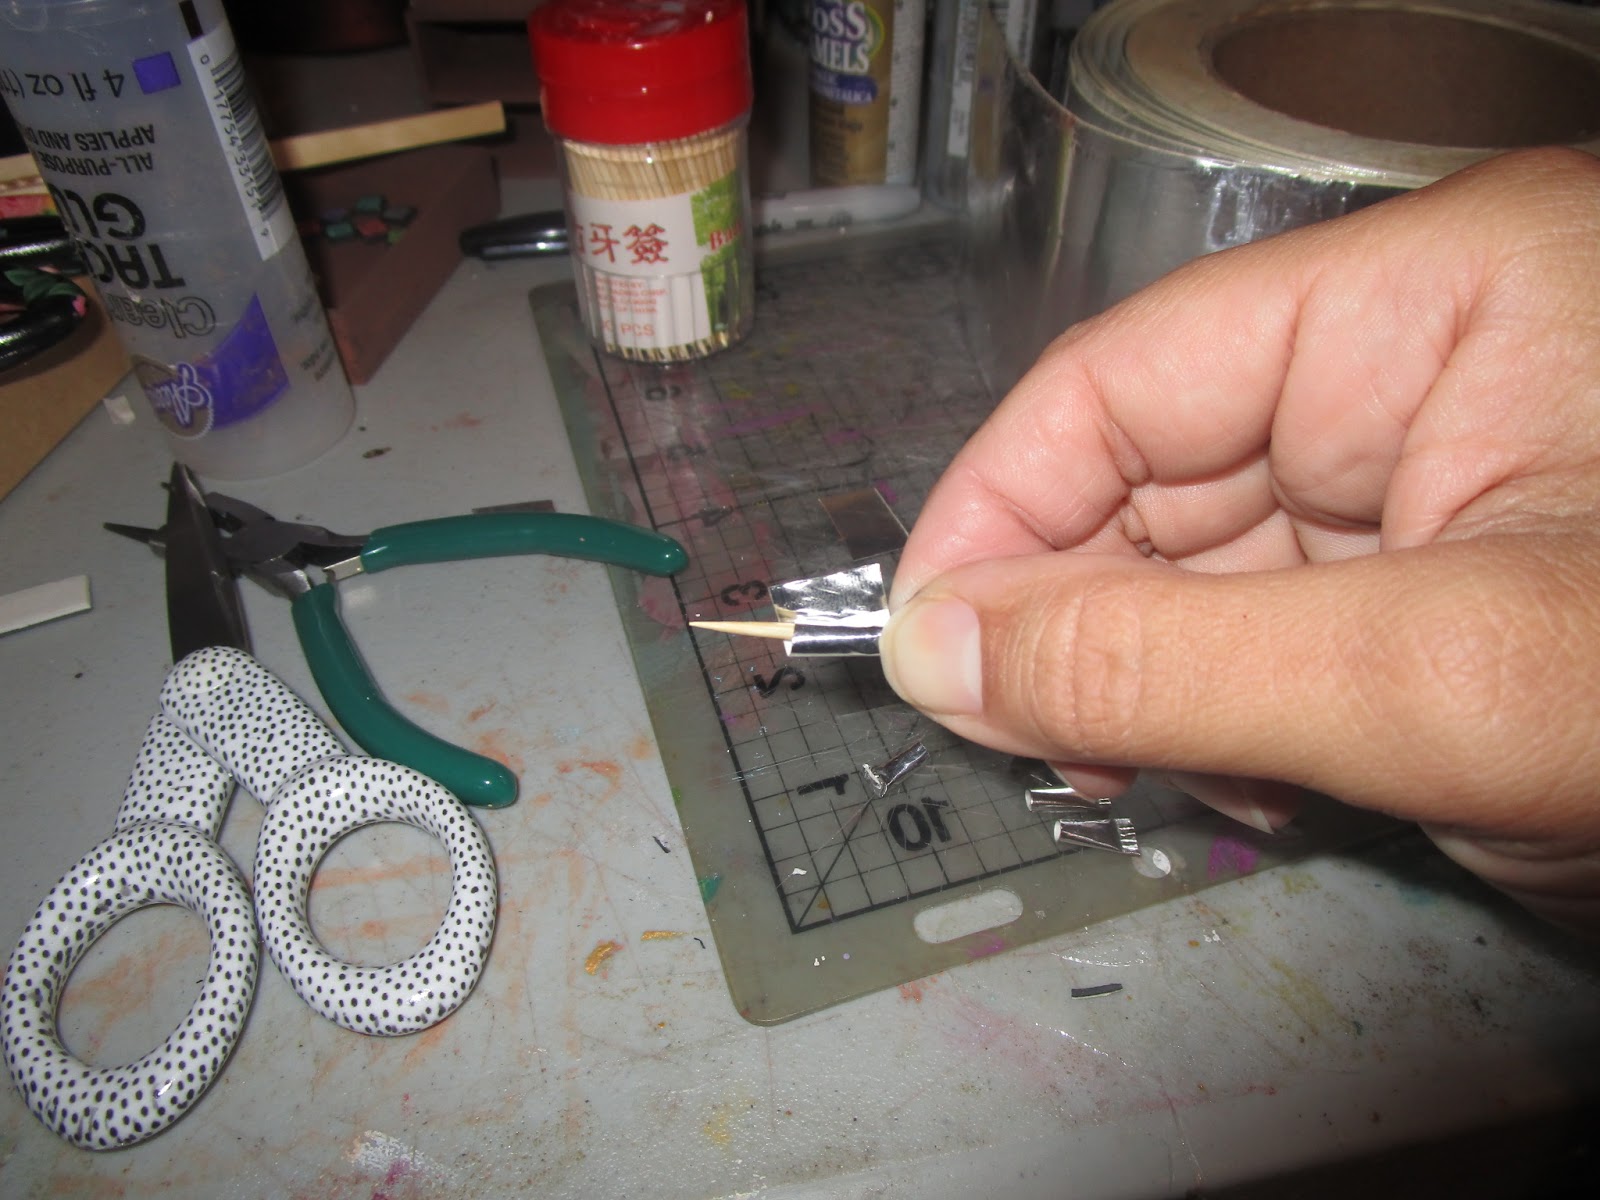
I put my wire in a puddle of glue. Allow it to dry and you can cut the excess off but still have added strength.

Making these adorable miniature rubber stamps was super easy. I just cut out these great miniature Alpha Stamp stamp images from the Tiny Craft Room Labels Collage Sheet. I adhered them with glue to a Basswood Strips - 3/8 Inches Wide and cut them apart with scissors.

To make them even more realistic, I attached some left over rubber trimmings.


The stamp pads were created using the same Craft Room Label collage sheet. I used foam tape to give my ink stamps depth. For the Rectangular Ink pads, I placed one side of the foam on a piece of white card stock and on the other side adhered the ink pad image. For the Square Ink pads, I used a black permanent marker to make the foam edge black after trimming.


I used toothpicks to make some mini colored pencils. Just trim to size and color with a marker. I dipped the ends onto a dark ink pad to make them more realistic.

Visit DIY miniature doll pencil Barbie School Supplies to see the tutorial that inspired me. Her pencils have greater detail and can actually be used!

Do you see any resemblance between my actual paintbrush containers and my miniature ones?

Who would have thought miniature paint brushes would be so simple to make. Cut the toothpick across on both ends, then take a hammer to one end to "squish" the wood down.


Many of the ideas for my miniature hutch came from my own studio.

I have been collecting vintage ledgers for years. I especially love my largest ones from Paris. They are from the late 1800s and early 1900s. Another ledger is full of teacher applicants with things listed that you would never ask now a days like their height, weight, marital status, and religion.


You can never have too many drawers to keep your treasures in. The one below holds many of my vintage photographs.


Just wouldn't be from my studio if it didn't have some doll heads on it somewhere. And you all know how I love my doll heads!


My miniature bottles are filled with the same vintage glass glitter as my actual storage containers. I used paper clay to make the seal top.

What cool goodies would you like to see added to my hutch? Leave me a comment and I'll try to find a way to create it and share. Thanks so much for stopping by!
xoxo
Rhonda...
Supplies Used:
Tiny Craft Room Labels CS
No comments:
Post a Comment